OpenCart - MasterCard Payment Gateway Services

Installation
Please use this guide to install the MasterCard Payment Gateway Services
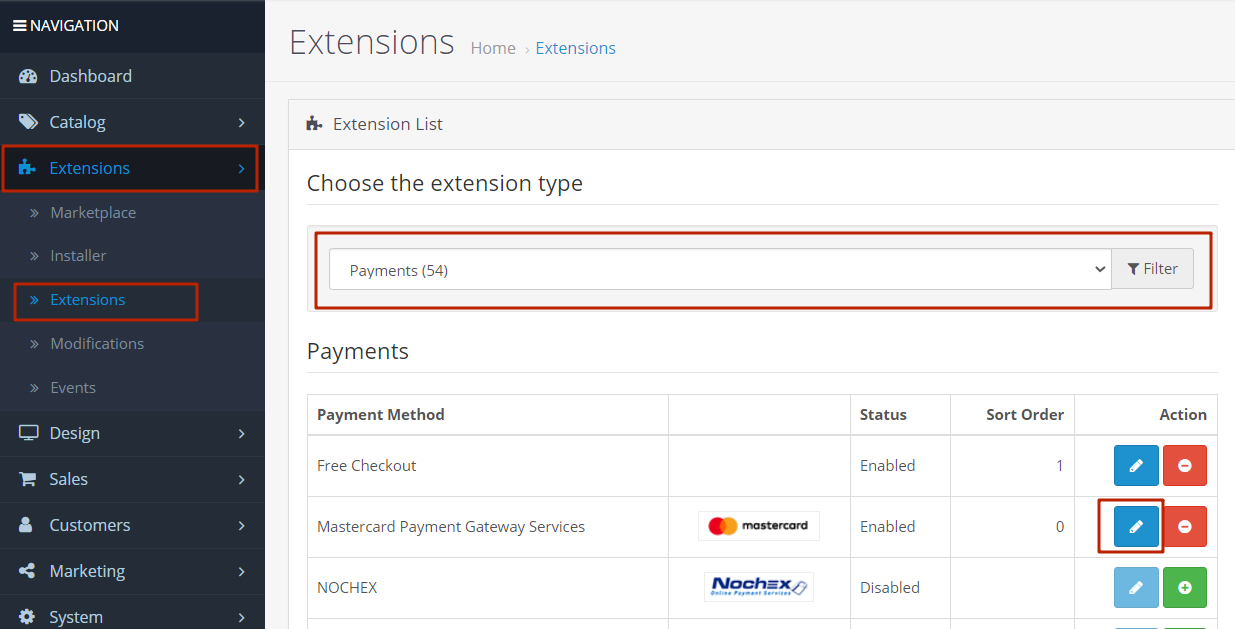
Once you have the Mastercard Payment Gateway Service module installed, you can configure it from the admin panel. Go to the OpenCart backend Extensions page, select the Payments dropdown option and do the configuration.
Compatibility
The module has been tested and is compatible with the below Opencart versions:
- 3.0.3.1
- 3.0.3.2
- 3.0.3.3
- 3.0.3.5
- 3.0.3.6
- 3.0.3.7
- 3.0.3.8
Feature Support
Opencart Mastercard Payment Gateway Service module supports the following list of features:
- Card payments
- Alternative payment methods
- Hosted Session
- Hosted Checkout
- Full refunds
- AVS
- 3DSv1
- 3DSv2
- Tokenisation
Configuration
The configuration consists of 3 tabs:
In this manual, we'll cover all the required configurations.
General Settings
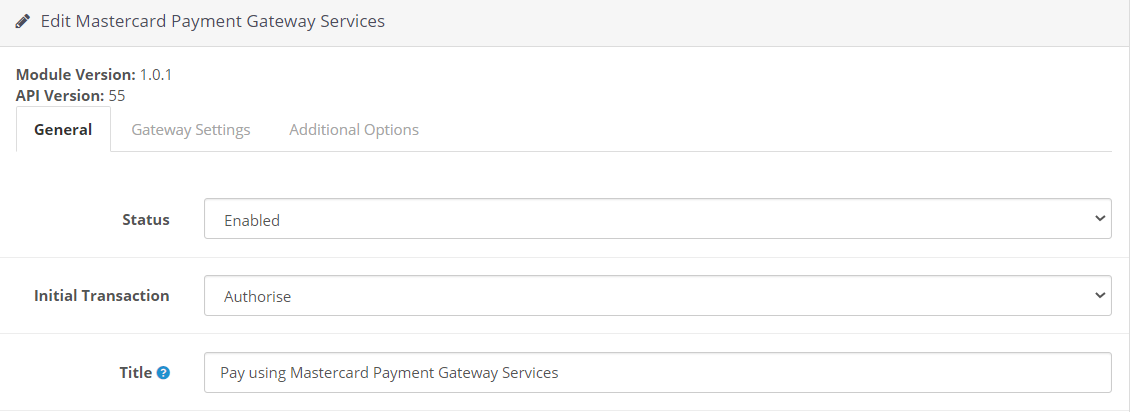
First of all, you need to enable the extension to use it as your OpenCart payment method.
The Initial Transaction option has 2 values:
- Purchase (Pay) - the funds will be transferred to the merchant account as soon as the user’s entered card details has been successfully verified and the order is placed.
- Authorize - that's the two-stage process; once an order will be placed, it will only authorize the user’s card details. The payment amount needs to be captured manually by the merchant.
The text specified in the Title section will appear on the front-end checkout page/payment method section.
Transaction method
There are two different payment flow methods under Hosted session integration:
I. Purchase (Pay)
If Purchase has been selected for the Payment Model, then the transaction will be done automatically. After the user has entered the card detail and submits the order, the amount of the total order will be deducted from the user’s card and will be automatically transferred to the merchant’s account. It may take some time for reflecting the amount into the merchant’s account, but the process will be automatic.
II. Authorize & Capture
If Authorize & Capture has been selected for the payment model, then the merchant will have to manually process transactions and accept the payment amount. Manually process of capturing funds can be done via Prestashop Admin as well as Merchant’s Mastercard Payment Gateway account login.
Integration Model
The module supports 2 different ways of integration, either Hosted Checkout or Hosted Session.
The Hosted Checkout model allows you to collect payment details from your payer through an interaction hosted and displayed by the Mastercard Payment Gateway. With this model of integration, you never see or handle payment details directly because these are collected by the hosted payment interface and submitted directly from the payer's browser to the Mastercard Payment Gateway.
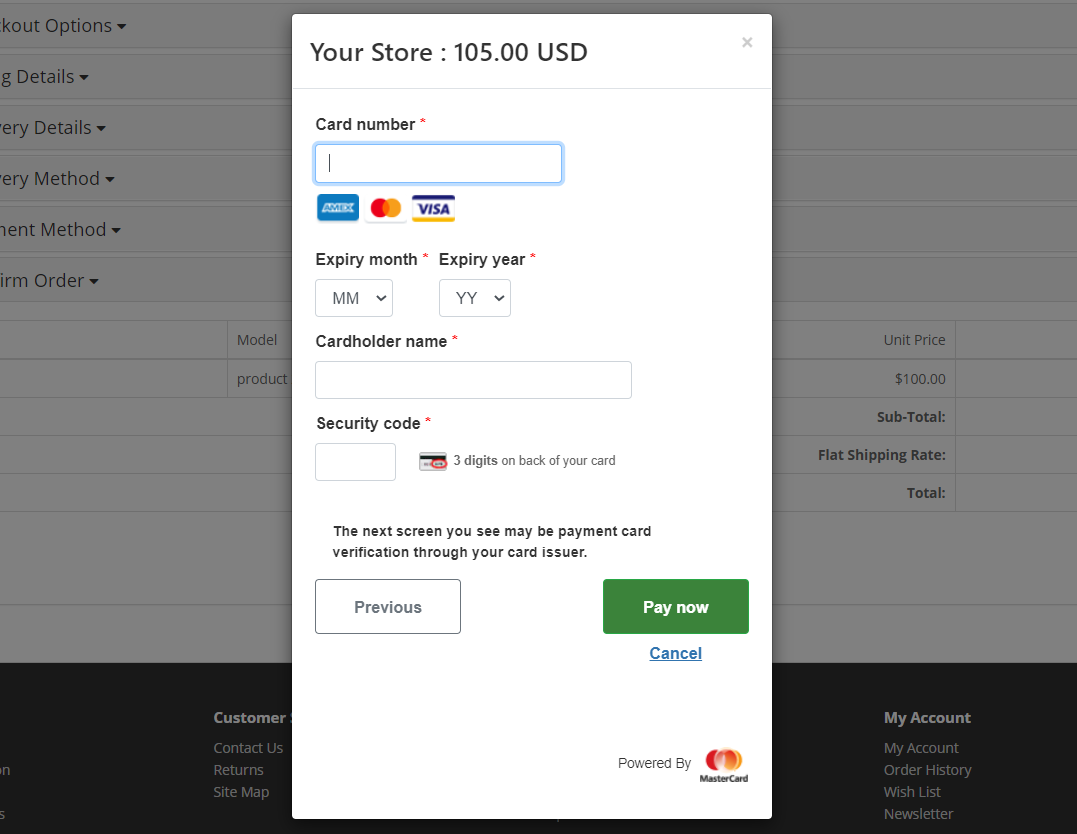
I. Hosted Checkout Popup
If Hosted Checkout is integrated and enabled for the Mastercard Payment Gateway module, then once the user will enter required card details on the popup and click on submit the order, upon successful authorization of entered card details, funds will be deducted from the user’s account and will be automatically transferred to merchant/seller’s account. It may take some time to get funds credited but this process will be automatic.
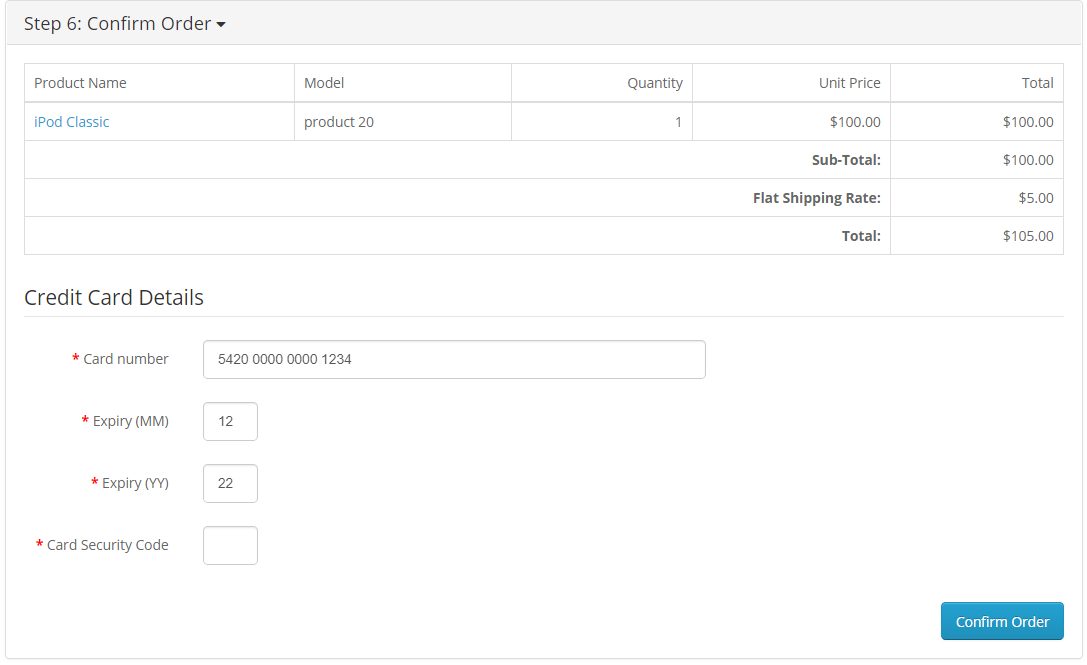
II. Hosted Session Integration
Choose the Hosted Session model if you want control over the layout and styling of your payment page while reducing PCI compliance costs. The Hosted Session JavaScript client library enables you to collect sensitive payment details from the payer in payment form fields, sourced from and controlled by Mastercard Payment Gateway. The gateway collects the payment details in a payment session and temporarily stores them for later use. You can then include a payment session in place of payment details in the transaction request to process a payment.
Depending on the selected integration method, the options of the configuration are slightly different:

If the Hosted Checkout is selected, the backend administrator can select the way to show the input fields for the card details.
The Lightbox option shows the data in the popup, like on the screen above, while the Redirect to Payment Page shows the fields in the new window, so the data occupies all the space available.

If the Hosted Session is selected, the backend administrator can allow customers to save the cards for further purchases.
No card details will be stored on the owner's website and the customer will still need to input the CSC/CVV code. It appears on the back of the card, to the right of the signature panel.

The Submit line item data to gateway allows the administrator choosing the shopping cart data (like product information, grand total, etc.) to be sent to MasterCard or not.
The store owner can choose the Sort order of the payment method if the store has several payment methods enabled. 0 is the highest priority.
Gateway Settings
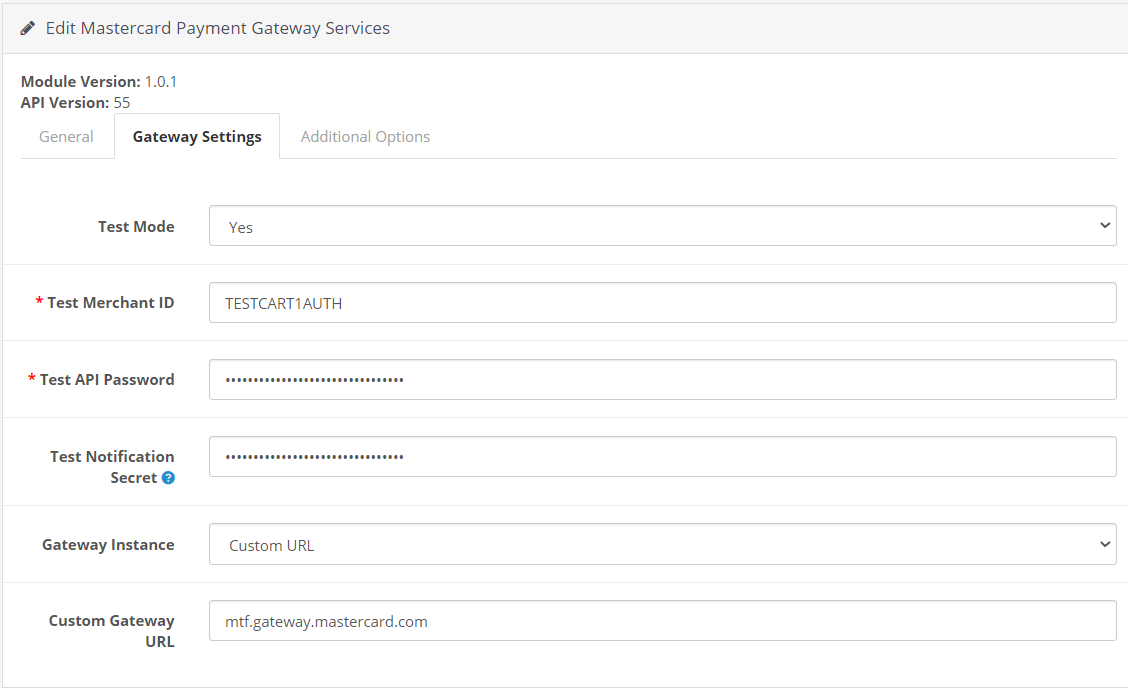
Test Mode
Firstly, it’s important to configure your Merchant credentials in TEST mode and make sure that everything works
The Test Mode setting toggles between Test and Live mode. Note that it's possible to add credentials for the test and live mode at the same time. Both modes have their own set of credential fields which you need to fill separately. It gives you the ability to switch between modes without re-entering your credentials every time.
You need to put the Test Merchant ID/Merchant ID first. The API password and the Webhook(Notification Secret) are to be taken from your merchant account. We'll cover these configurations a bit later in this manual.
The Gateway Instance should be selected based on your account region. It's possible to select the Custom URL as well in the field that will appear below.
If merchant credentials are not configured correctly, you can not enable any of the module's payment methods.
To find and set up the credentials, please login into your MasterCard Merchant Administration interface
API Password
To obtain an API password, you need to enable integration access via password.
Once logged into your merchant account, select Admin → Integration Settings
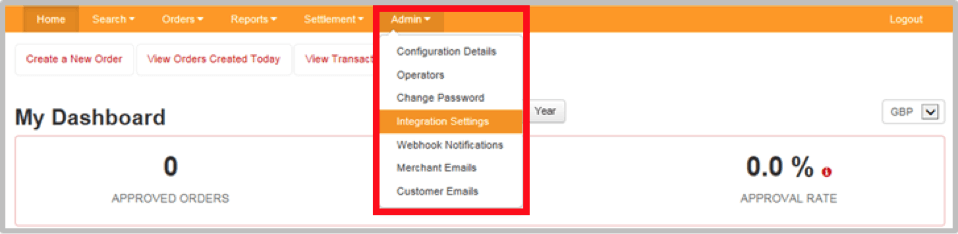
Click the Edit button on the Integration Settings page:

The Integration Authentication Passwords workspace will appear, you will need to click Generate New button next to Password 1:
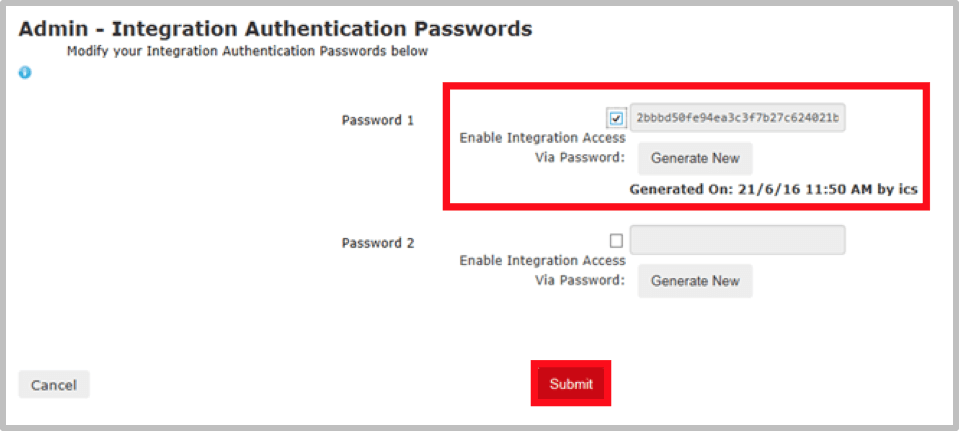
Once the password has been generated, select the Enable Integration Access Via Password checkbox, copy the password and click the Submit button.
Webhook Secret
To obtain the Webhook Secret, you need to enable integration access via password.
Once logged in in the merchant account, select Admin > Webhook Notifications
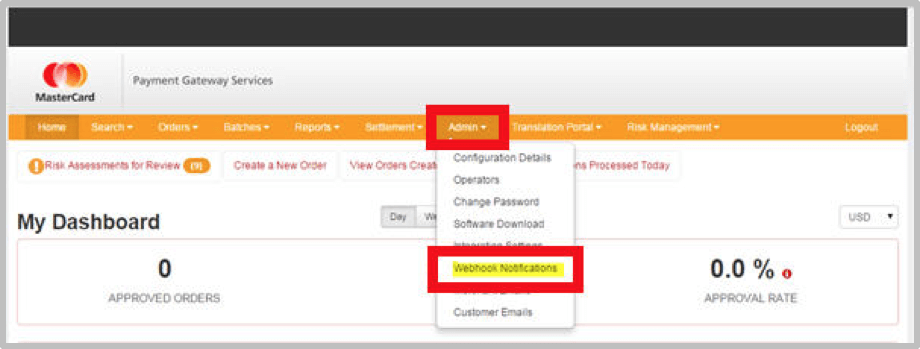
On the Webhook Notifications page:
- Select the Enabled checkbox.
- Select JSON/REST from the Web Services API Format drop-down list.
- Copy the Notification Secret (it will be used for the MasterCard Payment Gateway Services extension).
- Click the Save button.
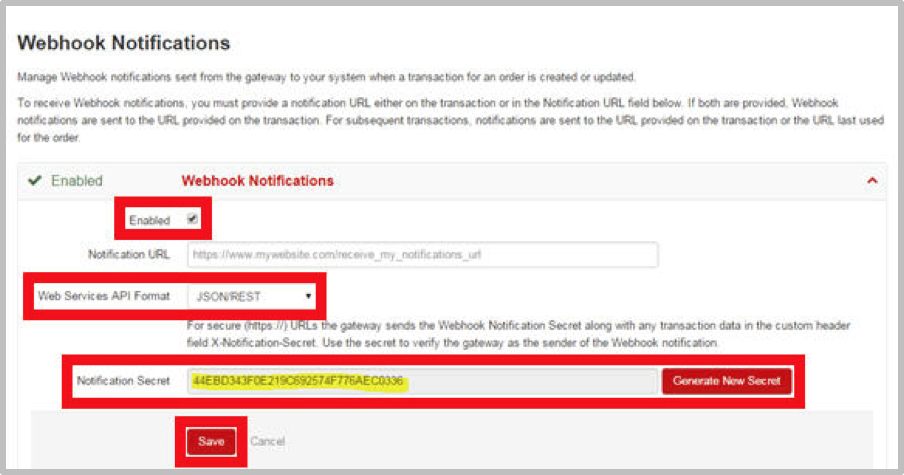
The notification URL is not used for this integration.
Additional Options
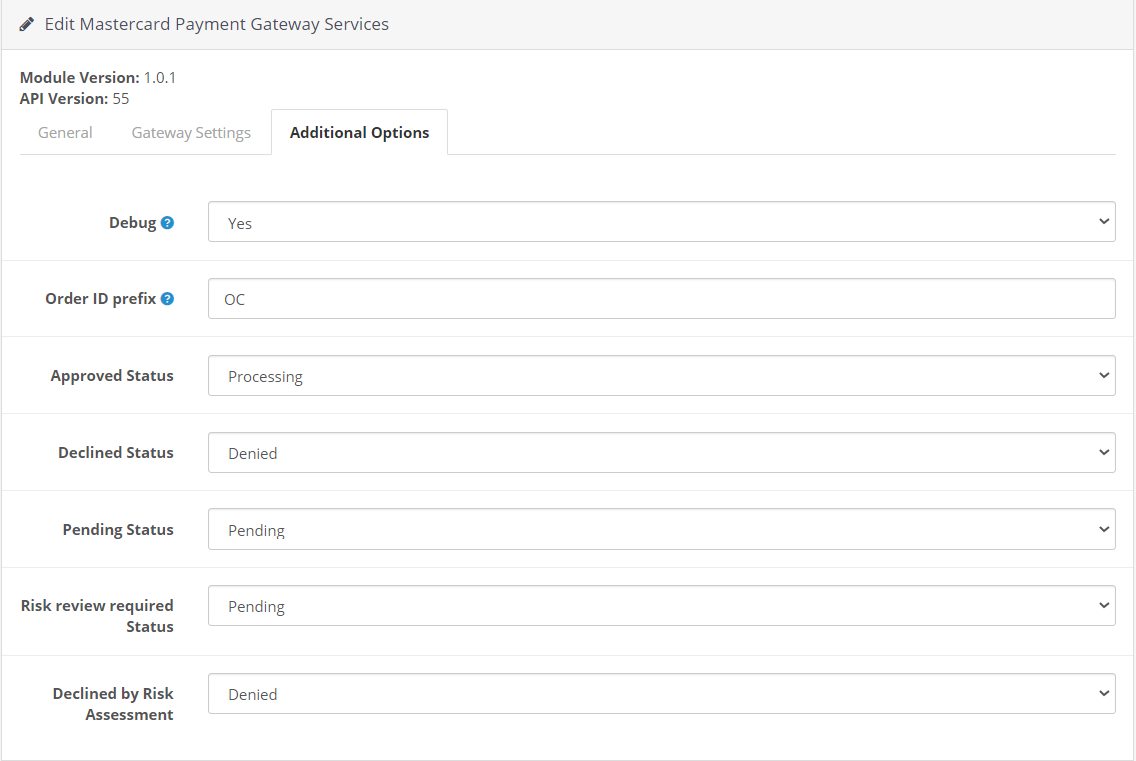
The merchant can enable logging by enabling the Debug option. Debug logging only works in the Test mode. It will log all the information into /storage/logs/mpgs_gateway.log file
Order ID Prefix should be specified in case multiple integrations use the same Merchant ID. It's done to avoid the possibility of duplicates in the Order IDs which may lead to payment problems.
On this workspace, the merchant can select the desired Order Status to be applied automatically for different payment cases.
Back-office Operations
TBA
Internal Testing
Once you have successfully configured your OpenCart Mastercard Payment Gateway Service, a few basic tests should be performed to make sure your implementation is working as expected. The scenarios that follow should be considered the minimum level of testing and MasterCard Payment Gateway Services encourage the creation of your own test scenarios that suit your specific business needs.
To access the MasterCard Payment Gateway test simulator, ensure gateway mode is set to TEST. The test simulator is configured to generate predictable results based on the transaction request and card details you supply.
You can trigger specific transaction responses, for example, the MasterCard Payment Gateway Response Code and Card Security Code validation, as well as Address Verification response codes. You can also test features like Risk Management and Wallet functionality. Details of test cards can be found here.
-
Successful Authorization including 3D Secure
- Ensure you can perform a successful transaction through the OpenCart checkout.
- Ensure the transaction is showing the correct state in both OpenCart Admin Panel and Merchant Administration
-
Declined Authorization
- Ensure declined transactions have the correct state in the OpenCart Admin Panel.
-
Create an Invoice & Capture Online
- Create an invoice from an authorized transaction.
- Ensure the transaction is showing the correct state in both OpenCart Admin Panel and Merchant Administration
-
Submit a full refund for an invoiced order
- Ensure you can perform a successful refund for the full amount of the order.
- Ensure the transaction is showing the correct state in both OpenCart Admin Panel and Merchant Administration
-
Submit a partial refund for an invoiced order
- Ensure you can perform a successful refund for a partial amount of the full order.
- Ensure the transaction is showing the correct state in both OpenCart Admin Panel and Merchant Administration
-
Refund, Capture, Void via Merchant Administration
- In some business scenarios, it may be necessary to undertake certain actions via Merchant Administration. It is possible (with the correct user privileges) to perform refunds, voids and, captures via the Gateway Interface.
- You should ensure you have sufficient business processes in place to manually update the order state in OpenCart where necessary.
Support
If you have completed all of the configuration steps above, but are not able to successfully process transactions, you may need to contact your Integrator.